Sunday, December 15, 2013

Leftover Ham: Posole Time!

Photo Credit: Emily Barney via Compfight cc
This is a good time to re-post my recipe for my favorite soup.  You have all that ham left and here is a fantastic way to use it!


I discovered how to make posole stew while living in Medanales, NM, in the summer of 2011.  Posole or pozole is the Spanish word for hominy.  In New Mexico posole stew is traditionally prepared at New Years with the leftover Christmas ham.  In Lexington, KY, Mexican restaurants usually serve pozole only on weekends, and it consists of a similar but much spicier soup made with pork and ground red chile paste rather than with green chiles.  This is my favorite soup.


  • 1 Tsp oil
  • 1 large onion
  • 1 quart chicken or vegetable broth
  • 1 can hominy, drained
  • 1 large can chopped green chiles (or better fresh roasted chiles)
  • 1 cup diced cooked ham
  • 1 Tsp oregano
  • 1 clove garlic


Sauté the onion in the oil in a large pan.  

When the onions are caramelized or translucent (depending upon your taste), add the broth, hominy, chiles, ham, oregano, and garlic.  Bring to boil.  

Reduce the heat and simmer for 20 minutes.  

This dish often tastes better the next day after it has set and seasoned a bit in the refrigerator.

A small bowl of posole -especially if with limited amounts of hominy- can make for a 200 calorie lunch or dinner.  One cup of hominy has 119 calories by itself.  


DIETS:
Diabetic:  yes
Gluten Free:  yes
Nightshade Family Free:  yes* (but only if you leave out the green chiles)
Paleo:  yes* (but only if you leave out the main ingredient, hominy)
SugarBusters:  yes
Sugar Free:  yes
Vegan:  yes* (but only if you use vegetable broth and leave out the ham)
Vegetarian:  yes* (but only if you use vegetable broth and leave out the ham)
Wheat Free:  yes
200 Calories or Under:  yes

Notice:  Be sure to check with your doctor and nutritionist about the safety of any eating plan for you.  Also, check ingredients as different brands and products may have different ingredients or have changed them since this post.  Some calories are estimates based on packaging.  

Saturday, December 14, 2013

Perfect Ham

Photo Credit: R o b e r t M via Compfight cc
I admit I love ham.  For me, it also brings back memories of visits with my grandmother Mary.  For her, every family gathering called for her classic menu of baked ham, potato salad, and baked beans.  Yum!

While I have loved a good baked ham since I was a boy, I never learned now to actually bake my own until the last few years.  After some trial and error -plus plenty of calls for advice to my mother- I now share with you, dear readers, my guide to the perfect ham!


1. First, let's talk hams.  If you can, find a ham still on the bone.  Other hams may have removed the bone and can be full of bits of ham pressed together or more solutions injected into the meat.  Get a ham and a ham bone -Fido will thank you.

2. Second, there are two kinds of basic curing methods for hams.  As folks say here in Kentucky, you can have "city ham" and "country ham".  Most Southerners are familiar with salt-cured country ham.  When I moved to Kentucky I was not familiar with the corresponding term of "city ham", but city hams are your more common, sugar-cured hams.  Buy yourself a nice city ham to bake.  (You can fry up some slices of country ham for a deliciously salty sidekick to your breakfast eggs.)

3. Cooking times:  Here is one of the great mysteries that kept me from making ham for years:  how long do you bake one?  It turns out the rule of thumb is really simple:  bake at 350F for <b>20 minutes per pound of ham</b>.  So, if you have a 5 pound ham, you would bake it for an hour and a half.

4. Recipe:  The final key to a perfect ham is a simple glaze that will knock your socks off in taste:

  • 1 can of regular, sugary cola (Coke or Pepsi preferably)
  • a pinch (around 1/4 teaspoon) of ground cloves
  • 1/2 cup of brown sugar
Unwrap and rinse your ham.

Pre-heat oven to 350F.

Place your ham in a large roasting pan.

Pour the can of soda over your ham.

Sprinkle the brown cloves on your ham.

Cover your ham loosely with aluminum foil and place in the oven.

Every 30 minutes to 1 hour remove the ham from the oven and baste the ham with the soda/clove/juices from the bottom of the pan.

30 minutes before your ham's bake time is finished, take out of the oven and pat the brown sugar onto the ham.  Put the ham back into the oven and finish baking.

Allow to sit for 10-15 minutes to absorb more rich juices and to cool slightly.  Slice and serve.

You should end up with a moist and succulent ham with a hint of cloves and sweetness.  


DIETS:
Diabetic:  yes* (most of the glaze ends up in the bottom of the pan)
Gluten Free:  yes
Nightshade Family Free:  yes
Paleo:  no (uses sugar)
SugarBusters:  no (uses sugar)
Sugar Free:  no (uses sugar)
Vegan:  no, most definitely not
Vegetarian:  no, most definitely not
Wheat Free:  yes
200 Calories or Under:  yes* (if you keep to a serving of around 1/2 cup)

Notice:  Be sure to check with your doctor and nutritionist about the safety of any eating plan for you.  Also, check ingredients as different brands and products may have different ingredients or have changed them since this post.  Some calories are estimates based on packaging.  

Friday, December 13, 2013

The Southern Cook's Secret Weapon

Southern cooks have used lard, the rendered fat of pigs, for centuries.  When I was a kid, I always thought it was gross that cooks in my family would save their bacon grease in a container to use for later frying or flavoring.  And now here I am with my own Mason jar of bacon grease in my refrigerator.  Move over Paula Deen!

While it is certainly not a healthy alternative to olive oil, canola oil, or many other oils, bacon fat has its place in the kitchen.  First of all, this salty oil with its bacon flavor would be kitchen waste if not used.  So there is an element of frugality to saving and using bacon fat.

When I lived in France I noticed many French dishes use a small bit of fat in some form (cream, oil, butter, lard, etc.) to provide both flavor and satiation.  Our bodies quickly metabolize carbohydrates but fatty foods take a bit longer and provide a feeling of richness and fullness to dishes.  Here is how to make your own bacon drippings...and excellent bacon!

Don't FRY bacon.  It's messy.  Instead, BAKE bacon!

THE BACON:  Lay out your strips of bacon on a baking sheet with a rim around it.  Put in an oven pre-heated to 325 F. Cook until the desired crispness.  Use tongs to remove the cooked bacon to a plate covered with several paper towels or napkins.  After the bacon has cooled, put in a plastic zip bag to either freeze -or if using in the next several days- refrigerate.  When you need some bacon for a recipe or for a yummy breakfast, reheat in the microwave for about 20 seconds per slice.  Wrap your bacon first in a napkin or paper towel to catch any grease splatters.

TIP:  My mother taught me how to bake bacon.  She cooks up an entire package of bacon at a time.  She cooks her bacon to slightly less crisp than she likes.  Then when she reheats in the microwave, the bacon will cook a bit more to the desired crispness.

THE BACON GREASE:  Once the bacon drippings in the baking sheet have cooled, tip the sheet to one corner and pour the bacon grease into a container.  I use a glass mason jar in case some of the grease is still hot.  Then keep in your refrigerator for future use.


DIETS:
Diabetic:  yes
Gluten Free:  yes
Nightshade Family Free:  yes
Paleo:  yes
SugarBusters:  yes
Sugar Free:  yes
Vegan:  no, most definitely not
Vegetarian:  no, most definitely not
Wheat Free:  yes
200 Calories or Under:  yes* (if used very sparingly, fat has a lot of calories in any form)

Notice:  Be sure to check with your doctor and nutritionist about the safety of any eating plan for you.  Also, check ingredients as different brands and products may have different ingredients or have changed them since this post.  Some calories are estimates based on packaging.  

Southern and Country Cookin'

Map courtesy of Wikipedia
After some posts about yummy Indian food, I'm going to switch gears and talk some about Southern and country cooking.  First, let's talk a bit about some of the historical influences on American regional cuisines.

As the map of the dominant ancestry in each US county in 2000 shows, more Americans trace their ancestry to Germany than any other country.  So why are there not more German restaurants in the US?


Well, I argue that German cooking merged with other influences to become Southern and "country cookin'".
I joke that the largest German restaurant chain in the US is "Das Cracker Barrel".  I believe delicious German schnitzel became country fried steak.  And the mysterious word cole slaw makes sense once you know that the word for cabbage in German is Kohl.  From mashed potatoes and gravy to good ol' American apple pie, these foods all have equivalents originating in Germany.

Of course, Americans and their food are a mish-mash of all the tasty food traditions domesticated by Native Americans or imported from Europe, Africa, and Asia.  The cooking technique of frying food for instance is much more common in west African cooking originally than in European.  So, it is not surprising that the South with its strong African American roots loves its fried chicken, fried this and fried that.  On the other hand, more common western European colonial cooking techniques such as roasting still dominate traditional menus for European-introduced holidays like Christmas, Easter, and Thanksgiving.  And for that hot sauce on tables from Taos to Tuscaloosa, we have Native Americans to thank for domesticating and introducing various hot peppers to the American table.  So the next time you put a bit of hot sauce on your fried chicken sandwich, you can relish your lunch knowing the Asian-domesticated chicken fried in an African technique with European-invented mayonnaise and Native American hot sauce is as thoroughly American and global as our country.

Thursday, December 12, 2013

Aloo Gobhi

Photo Credit: Pankajune via Compfight cc

I have had a fascination with aloo gobhi (or aloo gobi as it is sometimes written) since watching the love poured into making it in the film, Bend It Like Beckham.  Aloo is "potato" in Hindi and ghobi is short for phulagobhi or "cauliflower" in Hindi.  So, aloo gobhi means potatoes and cauliflower.  

Now this seems a strange combo in Western cuisines, but it is a delicious dish.  

Potatoes have a low glycemic index and thus are not a very good vegetable for diabetics.  Sweet potatoes on the other hand are packed with fiber and have a moderately high glycemic index.  So, I make my aloo gobhi as mitha aloo gobhi or sweet potatoes and cauliflower.  This dish is surprisingly delicious, and my adaptation of a recipe originally in Anupy Singla's The Indian Slow Cooker.

1 head of cauliflower, chopped into pieces
2 medium sweet potatoes, cooked (in microwave usually), peeled, and cut into cubes
1 large onion, chopped
1 can diced tomatoes
1 Tablespoon ginger paste (or fresh, chopped ginger)
1 Tablespoon minced garlic
4 cayenne peppers, stems removed
1 Tablespoon cumin seeds or ground cumin
1 Tablespoon red chili pepper
1 Tablespoon garam masala
1 Tablespoon salt
1 teaspoon turmeric powder
3 Tablespoons olive oil
1 Tablespoon fresh cilantro, chopped

Cook, peel and cube your sweet potatoes.  I usually cook mine in the microwave in 6 minutes on high.

Add the sweet potato and all the other ingredients EXCEPT the cilantro to your slow cooker.  Cook for 6 hours (the 4 hour setting will work too -or the 8 hour if you will be out of the house for awhile) in your slow cooker.  

Stir in some fresh, chopped cilantro and serve hot.  May be eaten with rice or not.  

NOTE:  This dish is great the next day when warmed up for lunch or dinner.


DIETS:
Diabetic:  yes
Gluten Free:  yes
Nightshade Family Free:  no
Paleo:  yes
SugarBusters:  yes
Sugar Free:  yes
Vegan:  yes
Vegetarian:  yes
Wheat Free:  yes

Notice:  Be sure to check with your doctor and nutritionist about the safety of any eating plan for you.  Also, check ingredients as different brands and products may have different ingredients or have changed them since this post.  Some calories are estimates based on packaging.  

Wednesday, December 11, 2013

Indian-Style Vegetable and Egg Fried Rice

Photo Credit: anantal via Compfight cc
This yummy recipes comes from the kitchen of my friend Sharmi:


Ingredients: 2 cups of basmati rice, 3 cups of water, oil, ghee (clarified butter) or butter, cinnamon stick, green cardamom, whole cloves, bay leaves, 1/2 cup raw cashew pieces, 1/2 cup of chopped onion, frozen peas, carrots, 3 large eggs, salt and sugar

1. 2 cups of Basmati rice, washed and drained
2. Soak 4 to 6 strands of saffron in half a cup of warm milk and set aside
3. In a wok heat 3 tablespoon oil and 1 tablespoon ghee (clarified butter), if you don't have any just add 1/4 th of a butter stick
4. Add half a cinnamon stick, 3 whole green cardamom, 4 whole cloves and 1 bay leaf
5. Add chopped onion and stir fry
6. Add vegetables and stir fry
7. Add pre-soaked rice and fry lightly
8. Add salt to taste and little bit of sugar
9. Add 3 cups of water and stir
10. Cover the rice and put it on medium heat and let it boil

If you want to use rice cooker then follow up to step 8 and pour everything in the rice cooker and follow step 9.

11. In a separate frying pan fry the eggs in oil and add to the rice when it's done
12. Serve hot

DIETS:
Diabetic:  yes* (in limited quantities, Basmati rice has a moderately high glycemic index)
Gluten Free:  yes
Nightshade Family Free:  yes
Paleo:  no
SugarBusters: yes
Sugar Free:  yes* (if made with a moderate/high glycemic index rice)
Vegan:  yes* (if you leave out the fried egg)
Vegetarian:  yes* (if you leave out the fried egg)
Wheat Free:  yes
200 Calories or Under:  yes (in limited quantities)

Notice:  Be sure to check with your doctor and nutritionist about the safety of any eating plan for you.  Also, check ingredients as different brands and products may have different ingredients or have changed them since this post.  Some calories are estimates based on packaging.  


Tuesday, December 10, 2013

Shrimp in Coconut Sauce

Photo Credit: PratikSurti via Compfight cc
This recipe is another from the Bengali kitchen of my friend Sharmi.


1 pack large or extra large raw shrimp, peeled and deveined
salt
oil
1 onion
5-6 cloves of garlic
1 small piece of ginger
3-4 pods of green cardamom
1 cinnamon stick
4 whole cloves
1 bay leaf
ghee (clarified butter)
1/2 teaspoon turmeric powder
salt to taste
1 can coconut milk

OPTIONAL:  1/2 teaspoon sugar

1. Wash the shrimp and marinate with 1/2 teaspoon of turmeric powder and salt to taste
2. In a coffee grinder, grind 1 cinnamon stick, 4 whole cloves and green cardamom
3. Chop 1 onion, 5 or 6 cloves of garlic and a small piece of ginger together
4. Heat oil in a wok or cooking pan
5. Stir fry the shrimp and set aside
6. Add ghee (clarified butter) to the remaining oil or you may add a little more oil if needed
7. Add the spices you previously ground and 1 bay leaf
8. Add the chopped onion, ginger and garlic and stir
9. Add the shrimp and a little bit of sugar and stir
10. Add 1 can of coconut milk to the shrimp and stir well (shake the can well before opening)
11. Put on a low flame to a low boil/simmer
12. Serve hot

DIETS:
Diabetic:  yes
Gluten Free:  yes
Nightshade Family Free:  yes
Paleo:  yes* (if made without ghee)
SugarBusters: yes
Sugar Free:  yes
Vegan:  no
Vegetarian:  no
Wheat Free:  yes
200 Calories or Under:  yes (in limited quantities)

Notice:  Be sure to check with your doctor and nutritionist about the safety of any eating plan for you.  Also, check ingredients as different brands and products may have different ingredients or have changed them since this post.  Some calories are estimates based on packaging.  

Monday, December 9, 2013

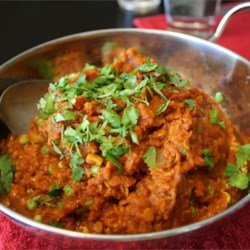
Red Lentil Curry

Emma Maher over on Allrecipes.com

This recipe comes from Emma Maher over on Allrecipes.com.  I make this dish every month or so because it is such a big hit at my house.  This is the first time I've posted a link to another recipe site, but this Indian-inspired dish is just too delicious to not share.

This dish warms up very nicely for leftovers.


DIETS:
Diabetic:  yes*  (has a bit of sugar which you can leave out if you wish)
Gluten Free:  yes (though be careful they were not packaged and contaminated at a flour mill)
Nightshade Family Free:  no (has chili pepper)
Paleo:  no (contains legumes)
SugarBusters:  yes* (if you leave out the bit of sugar)
Sugar Free:  yes* (if you leave out the bit of sugar)
Vegan:  yes
Vegetarian:  yes
Wheat Free:  yes
200 Calories or Under:  yes

Notice:  Be sure to check with your doctor and nutritionist about the safety of any eating plan for you.  Also, check ingredients as different brands and products may have different ingredients or have changed them since this post.  Some calories are estimates based on packaging.  


Sunday, December 8, 2013

Chicken Tikka Masala

I love Chicken Tikka Masala!  I love Tofu Tikka Masala too!  Many non-Indian people do love this dish.  For many -myself included- it is often the dish that first introduces non-Indians to the complexity and deliciousness of Indian food.

Like a number of dishes served in the West, Chicken Tikka Masala is actually part of a distinctive Anglo-Indian cuisine that began during the Raj, the British colonial period in India.  This new hybrid cuisine adapted Indian ingredients and cooking methods to British tastes.

In fact, there is some controversy over whether Chicken Tikka Masala was actually developed in South Asia or created by Indian restaurateurs in Great Britain.  Whatever its origins, Chicken Tikka Masala is hugely popular in Great Britain.  I hope you will love it as well!

I copied down my original recipe from somewhere on the Web and have been tweaking it for some years. My hat off to whoever and wherever this great recipe was first born...and I hope you will like the tweaks I have made after experimenting with this dish.

This dish is traditionally made with chicken, but you can also optionally make this dish with tofu, turkey, vegetables such as potatoes or mushrooms, or paneer (a type of Indian cheese).  This dish has a long list of spices but is otherwise not complicated to make.  You can experiment with what spices you have if you do not have all of the recipe's spices.

3-4 boneless chicken breasts, cut into cubes
1 onion, minced
1 jalapeno pepper, minced
1 clove garlic (or 1/2 teaspoon minced garlic)
2 Tablespoons butter
1 cup plain yogurt
1 Tablespoon lemon juice
4 teaspoons ground cumin
1 teaspoon ground cinnamon
1 Tablespoon ground coriander
3 pods of cardamom
1 Tablespoon garam masala (available at Indian grocery stores)
2 teaspoons cayenne pepper
1 Tablespoon fresh ground or minced ginger
4 teaspoons salt
2 teaspoons paprika
1 can (8 ounces) tomato sauce or 2 small cans of tomato paste
1 cup cream
1/4 cup cilantro, chopped

OPTION:  Add 1 Tablespoon brown sugar for a slightly sweeter version.
OPTION 2:  If you like a hotter -read fiery- chicken tikka masala, add more cayenne pepper or whole cayenne peppers.


Saute the chicken and minced onion in 1 Tablespoon of the butter until the chicken is cooked.

In a separate large saucepan or stock pot, melt the remaining 1 Tablespoon butter and saute the jalapeno and garlic for 2 minutes.  Add the yogurt, lemon juice, cumin, cinnamon, cayenne pepper, ginger, coriander, cardamom, garam masala, salt, paprika, tomato sauce, cream, and cilantro.  Simmer on low heat for 20 minutes.

Add the cooked chicken and onions to the sauce.  Simmer for 10 minutes.

Serve with a good Basmati rice and/or naan (a delicious Indian bread usually served with hot butter melted on top).

NOTE:  The original dish called for 7 teaspoons of salt, but I have cut back.  You may wish to salt more to your own tastes.  With all these wonderful spices, this dish improves after a day of sitting in the refrigerator and makes excellent leftovers.

DIETS:
Diabetic:  yes*  (but use Basmati, brown, or other rice with a high glycemic index)
Gluten Free:  yes
Nightshade Family Free:  no (has peppers)
Paleo:  no (has dairy)
SugarBusters:  yes* (but leave off the optional brown sugar and use Basmati, brown, or other rice with a high glycemic index)
Sugar Free:  yes* (but leave off the optional brown sugar)
Vegan:  no
Vegetarian:  yes* (if prepared with tofu or vegetables)
Wheat Free:  yes
200 Calories or Under:  no

Notice:  Be sure to check with your doctor and nutritionist about the safety of any eating plan for you.  Also, check ingredients as different brands and products may have different ingredients or have changed them since this post.  Some calories are estimates based on packaging.  

Friday, December 6, 2013

Pulao Rice

Photo courtesy of Wikipedia.
Pulao has literally been conquering the hearts and stomachs of people for over 2,000 years.  This particular recipe for this wonderful dish comes from my friend Sharmi Ray, a native of Kolkata (formerly Calcutta), India.  Sharmi first introduced me to pulao, a sweet, incredibly fragrant dish with a long history.  My mother loves this dish, and hopefully you will too!

Pulao has many names.  Americans may be most familiar with the Turkish term, rice pilaf.  Pilaf in turn comes from a Persian word, and the dish itself can be found in cuisines from Indonesia to Spain.

Wikipedia has an interesting historical tidbit.  Historical documents record that when Alexander the Great conquered the Persian Empire and was in the satrapy/province of Sogdiana (now in Central Asia), he was served what appears to be pulao.  He and his troops reported loved this fragrant rice and took the recipe home with them to Macedonia and Greece.

  • 2 cups of basmati rice
  • 3 cups of water
  • 1/2 cup of milk
  • 3 tablespoons oil
  • 1 tablespoon ghee (clarified butter) or butter
  • saffron
  • 1/2 teaspoon ground nutmeg
  • 1 cinnamon stick
  • 3 whole green cardamom pods
  • whole cloves
  • 1/2 cup raw cashew pieces
  • raw almond pieces (optional)
  • salt to taste
  • 1/2 teaspoon sugar
  • raisins (optional)
  • slivered carrots (optional)

Wash and drain 2 cups of Basmati rice.

Soak 4 to 6 strands of saffron in half a cup of warm milk and set aside.

In a wok or large skillet heat 3 tablespoons oil and 1 tablespoon ghee (clarified butter).  If you don't have ghee, just add 1/4 of a stick of butter.

Add half a cinnamon stick, 3 whole green cardamom pods,  and 4 whole cloves to the oil/butter/ghee.

Add half teaspoon of ground nutmeg.

Option:  You can also add raisins and slivered carrots for a sweeter taste and more color.

Add the raw cashew nuts and almonds.  Stir fry. (If you got roasted nuts then skip this step and add directly to rice after adding the rice to the oil in the next step.)

Add the pre-soaked rice to the spices and nuts and stir fry lightly.

Add salt to taste and a teaspoon of sugar.

Add 3 cups of water and stir the mixture.  (Alternately, add the rice and spice mixture to your rice cooker with 3 cups of water.)

Add the saffron milk

Cover the rice and put it on medium heat and let it boil. (Alternatively, turn on your rice cooker.)

Check few times until the rice is done. If the rice needs more water just sprinkle on top, stir, and leave it covered with very little or no heat. The rice's heat will cook it further.

Serve hot.

From Sharmi Ray, Lexington, 2013.


DIETS:
Diabetic:  yes* (Basmati rice has a high glycemic index but consume no more than 1 cup and substitute the sugar)
Gluten Free:  yes
Nightshade Family Free:  yes* (do not use tomatoes as an option)
Paleo:  no
SugarBusters:  yes* (if you use Basmati, brown or other high glycemic index rice and leave out the sugar)
Sugar Free:  yes* (if you leave out the sugar or use a sugar substitute)
Vegan:  yes
Vegetarian:  yes
Wheat Free:  yes
200 Calorie Meal:  yes* (if you consume no more than 1 cup or less of the dish and leave out the nuts)

Notice:  Be sure to check with your doctor and nutritionist about the safety of any eating plan for you.  Also, check ingredients as different brands and products may have different ingredients or have changed them since this post.  Some calories are estimates based on packaging.  

Thursday, December 5, 2013

Fiery Eggplant


For Indian Week, I wanted to repost this delicious recipe and put in a plug for Anupy Singla's excellent slow cooker Indian cookbook, The Indian Slow Cooker:  50 Healthy, Easy, Authentic Recipes.


  • 1 large eggplant, cut into wedges
  • 1 can diced tomatoes
  • 1 Tsp ginger paste or a 2 inch piece of fresh ginger, diced
  • 1 Tsp minced garlic or 10 cloves of fresh garlic
  • 2/3 c vegetable oil
  • 1 Tsp fennel seeds
  • 8-10 cayenne, Serrano, or green Thai chilis, stems removed, chopped
  • 2 Tsp ground coriander
  • 1 tsp turmeric powder
  • 2 tsp red chili powder
  • 1 Tsp salt


Place the cut eggplant in a colander sitting on a plate.  Sprinkle with salt.  Let stand at least 30 minutes or more.  The eggplant will release a brown liquid.  This process will remove much of the eggplant’s bitterness.  

Then wash off the salt and empty the eggplant onto a paper towel to dry somewhat.

Add the diced tomatoes, ginger paste, and minced garlic to the crockpot. 

Saute the fennel seeds in about 1 Tsp oil over medium-high heat.  Then scrap the seeds and oil into the crockpot.  The heating releases the fennel’s flavor.

Add the vegetable oil, chilis, coriander, turmeric, and eggplant to the crockpot.  

Cook on low for 3-4 hours.

Add salt to taste when the eggplant is done.

Adapted from Anupy Singla’s The Indian Slow Cooker:  50 Healthy, Easy, Authentic Recipes, 2010.

DIETS:
Diabetic:  yes
Gluten Free:  yes
Nightshade Family Free:  no
Paleo:  yes
SugarBusters:  yes
Sugar Free:  yes
Vegan:  yes
Vegetarian:  yes
Wheat Free:  yes
200 Calories or Under:  no (this dish is too rich in oils)

Notice:  Be sure to check with your doctor and nutritionist about the safety of any eating plan for you.  Also, check ingredients as different brands and products may have different ingredients or have changed them since this post.  Some calories are estimates based on packaging.  

Wednesday, December 4, 2013

Pakoras

Photo Credit: bro0ke via Compfight cc
Pakoras are delicious Indian appetizers.  I like to tell people they are India's answer to the hushpuppy. ;)

It seems many cultures develop a dish consisting of a fried dough.  India has several, but I am most familiar with pakoras since they are often served in Indian restaurants in the US.

Serve pakoras hot with various chutneys such as tamarind, mango, cilantro, or onion chutney.


This recipe calls for besan, chickpea flour, and garam masala, a spice mix.  You can find chickpea flour at Indian specialty grocers or can substitute regular, wheat flour though the consistency and taste won't quite be the same.  I also urge you to experiment with different spices as additions to your batter.  Garam masala, coriander, garlic, various curry spice blends, cumin, and other flavors can make for nice additions.  Find your favorite!

1 cup chickpea flour
3/4 cup water
1 teaspoon garam masala (optional)
Vegetables (usually spinach leaves, cauliflower florets, or onion rings)
Vegetable oil enough for your deep fryer

Mix the chickpea flour, water, and spice together.  The batter should be a thickish consistency similar to a hushpuppy or thick pancake batter.

Chop your spinach (my favorite vegetable for pakoras) and mix into the batter.  You can use this recipe with onions cut into rings, cauliflower florets, or about any vegetable.

Heat your oil.  Slide a spoonful of the vegetable batter into the oil and cook until a dark, golden brown.

Remove the fried pakora and drain on a paper towel on a plate.

Serve hot with your favorite chutney.

DIETS:
Diabetic:  no
Gluten Free:  yes if you use chickpea flour which is gluten free
Nightshade Family Free:  yes
Paleo:  no
SugarBusters:  no
Sugar Free:  yes but contains carbohydrates
Vegan:  yes
Vegetarian:  yes
Wheat Free:  yes if you use chickpea flour which contains no wheat flour
200 Calories or Under:  no (this dish is too rich in oils and carbs)

Notice:  Be sure to check with your doctor and nutritionist about the safety of any eating plan for you.  Also, check ingredients as different brands and products may have different ingredients or have changed them since this post.  Some calories are estimates based on packaging.  

Tuesday, December 3, 2013

Fruit Chutney

Photo Credit: checkmihlyrics via Compfight cc

This recipe comes from my friend Sharmi Ray.  A native of Kolkata (formerly Calcutta) in the eastern Indian region of Bengal, Sharmi shared with me her recipe for the preserves-like chutney.  While chutney can be made with various ingredients to be savory or sweet, this recipe is for a delicious, fruity, sweet version.  Enjoy!


  • Apples, pineapple, mixed fruits, or tomatoes (your choice, fresh or diced in a can)
  • 2 tablespoon oil
  • ½ teaspoon mix of mustard seeds, fenugreek, and fennel seeds
  • Dash of salt
  • ~1 cup sugar
  • Raisins or pieces of dates

Cut the fruit into small pieces.  You may also use a can of diced fruit/tomatoes.

Heat 2 Tsp oil in a cooking pan.  Add seed mix.  Be aware it will splatter.  

Immediately add the diced fruit.  

Add the salt.  

Cover and cook on medium heat until the fruit becomes soft.  Stir occasionally.  If there appears to be insufficient water from the fruit, add some water.  

Add sugar according to your taste.  Do not add sugar until the contents are entirely tender!  

Bring the sugar and fruit mixture to a boil.  

Add raisins or pieces of dates.  

Let the chutney cool.  Can or store in the refrigerator.

From Sharmi Ray, Lexington, 2008.


DIETS:
Diabetic:  no
Gluten Free:  yes
Nightshade Family Free:  yes* (do not use tomatoes as an option)
Paleo:  no
SugarBusters:  no
Sugar Free:  no
Vegan:  yes
Vegetarian:  yes
Wheat Free:  yes

Notice:  Be sure to check with your doctor and nutritionist about the safety of any eating plan for you.  Also, check ingredients as different brands and products may have different ingredients or have changed them since this post.  Some calories are estimates based on packaging.  

Monday, December 2, 2013

Indian Week!

This week I'm posting a series of recipes from India or inspired by Anglo-Indian cuisine. Several Indian friends have provided me these wonderful recipes from their own collections.  I'm also adding some recipes I've found and adapted from cookbooks.

I came late to enjoying Indian food.  I first tried Indian food at a rather mediocre Indian restaurant in North Carolina in the 1980s.  The food -or at least what I chose- was not very good, and for over a decade I decided I didn't like Indian food. It was not until the 1990s when I moved to Lexington and had delicious home-cooked food by my Sri Lankan classmate, Lavi, that I learned Indian food is like all other foods:  good when prepared well and not so good when badly prepared.  My friend Sharmi and friend/former graduate student Roshni also educated me greatly about Indian cooking.  I am thankful to have met such three wonderful cooks!


Anglo-Indian Cooking

I am certainly no expert on Indian cooking.  Most of what I know about Indian food is really more knowledge of the Anglo-Indian cuisine developed for British tastes and now popularized in American Indian restaurants.  Still, I'm going to give you my limited understanding of Indian regional specialties and how they have influenced the delicious foods we find in Indian restaurants in the US.

First of all, more human beings live in south Asia (India, Pakistan, Nepal, Bhutan, and Sri Lanka) than live in any other region of the world.  This region is enormously diverse in terms of ethnic groups, languages, religions, and of course, food.

Like every country, India's regional cuisines are influenced by the climates and crops that grow in different regions.  Western India consists of arid and desert areas.  The North contains the foothills and mountains of the Himalayas.

In general, the North and West grow more wheat.  The South and more wet East use more rice.  Red meat is more common in the north with fish along the coasts and vegetarian foods being more common in the South.  Gujurat, a west Indian state, is also famous for its vegetarian-based cuisine.

The areas along the border with Pakistan and the western Ganges Valley have a long history of influence by Muslim groups from central Asia.  These groups brought elements of a cuisine built around herding and dairy.  Thus, dairy foods such as butter, ghee (a refined butter), and yogurt usually come from this part of India.  Madhya Pradesh and Haryana are states with these influences and cited as sources for yogurt-based dishes like korma chicken and lassi (a yogurt drink).

While Punjab is listed as a north Indian state, it is an ancient region now divided between India and Pakistan. Much of the Anglo-Indian and Indian foods we find in American restaurants come from this region including: tandoori chicken, naan (a wheat bread like a leavened tortilla), pakoras (India's answer to the hushpuppy), and paneer (a fresh cheese usually pressed and cut into cubes).

The South also has contributed to Anglo-Indian cuisine with more vegetarian dishes such as dal (lentil-based stews of sorts), sambar (another lentil-based dish), and biryani (a popular rice dish supposed created at the former Mughal court kitchens).  Many of India's spices as well as coconuts grow in the South.  Southern Indian cooking is often spicy -even by Indian standards- and coconut and coconut milk is more frequently used than the butter and ghee used in the North.  The South also contributed mulligatawny, a peppery stew whose interesting name is a corruption of the Tamil phrase for "pepper water".

Eastern Indian cooking is perhaps the least known in the Americas.  West Bengal and other coastal and river areas emphasize a lot of fish and seafood in their cuisine.  Hot chilis are also common in Bengali cooking.
Away from the coasts in Assam and surrounding areas, tea is grown in the hill country there.  Several areas also have a proud tradition of brewing local beers.  Chinese, Tibetan, Burmese, and Thai cooking influences also are common in the north and northeast of the Eastern region.  Sikkim, a small state in the Himalayas, is famous for its momos (dumplings very similar to Chinese potstickers or jiaozi or Japanese gyoza).

The Andaman and Nicobar Islands are part of the country of India but largely remote and isolated.  Many of the tribal Andaman Islanders have almost no contact with outsiders and rely on fishing and fruit for their diets. So their contributions to Indian cooking has been rather limited.

Indian cooking has far more variety than my brief description covers, but I hope you will have some frame of reference for understanding the delicious recipes coming this week!


Monday, November 25, 2013

Vegetable Gold Mine

When I am cooking in the kitchen, I invariably produce a variety of vegetable scraps that I used to toss away.  Now I view these as a gold mine for making vegetable stock!


These scraps:

  • onion peels
  • the outer leaves of cabbage
  • the leafy parts of celery stalks
  • the ends of carrots, peppers, tomatoes, etc.
  • the peelings from apples, carrots, and pears
  • basically any vegetable part that is clean and not rotted
are fine makings for vegetable stock.  I keep a large plastic carton in my freezer.  When I start chopping vegetables I pull it out and put these scraps in the carton.  When it gets full I toss the scraps in a stock pot with water, bring to a boil, and then simmer for an hour or two along with some salt and black peppercorns.

The end result is a delicious vegetable stock!  Yum!

Once the stock cools, I put it in plastic containers and freeze.  When I need stock for a recipe or soup, I have some homemade stock which I've made from what otherwise would have been food waste.

And, what about those boiled scraps once the stock is strained?  Well, you can compost them for some fine soil to grow your garden vegetables.  Or, if you have a friend with chickens, the scraps make a fine chicken feed.   

DIETS:
Diabetic:  yes
Gluten Free:  yes
Nightshade Family Free:  yes* (depending on the vegetables used in the stock)
Paleo:  yes
SugarBusters:  yes
Sugar Free:  yes
Vegan:  yes
Vegetarian:  yes
Wheat Free:  yes
200 Calories or Under:  yes

Notice:  Be sure to check with your doctor and nutritionist about the safety of any eating plan for you.  Also, check ingredients as different brands and products may have different ingredients or have changed them since this post.  Some calories are estimates based on packaging.  

Sunday, November 24, 2013

Being Thankful

"Waffle"
As we enter the week of Thanksgiving here in the United States, it is a good time to pause and consider gratitude for the plenty in our lives.  Around the world millions face hunger as a daily reality.  The US Department of Agriculture estimates that 46 million Americans in 2012 face food insecurity.  Almost 15% of Americans and 1 in 5 American children go to bed hungry.

In my work with school teachers and school resource center workers, I hear heartbreaking stories of children who basically have no or little food the entire weekend they are away from school.  Some schools now send home backpacks with nutritious foods.

I am grateful my godsons Leon and Wes (AKA Waffle) -the handsome fellow in this picture- are well fed and cared for by loving parents.  Not all children are so lucky.

So, this week my recipes are focused on gratitude and useful, delicious ways to extend food that might otherwise be thrown away.

Friday, November 22, 2013

Mashed Potatoes for Mo

Photo courtesy of I Believe I Can Fry
My friend John G. first introduced me to a similar dish at a delicious dinner with him and others at his home in Denver.  I've since experimented to try to recreate the dish.  Here is the result of my experiments.

My wonderful friend Maureen -aka Mo- is allergic to plants in the Nightshade family such as potatoes, tomatoes, peppers and eggplant.  This allergy put a real damper on enjoying homemade mashed potatoes.

Similarly, white potatoes high glycemic index make them more of a no-no for diabetics.  This wonderful recipe is so good and similar in texture and flavor to mashed potatoes that you may fool your family -and even your own tastebuds!


  • 1 clove of garlic
  • 1/2 an onion, minced
  • 1/4 cup olive oil
  • Salt
  • 3/4 cup of chicken or vegetable stock
  • 1 can of cooked cannellini beans (cannellini beans are white kidney beans)


    Saute the onion with a dash of salt until translucent (about 3 minutes) in the oil over medium heat.  Add the garlic and cook until the garlic is just barely beginning to brown.  

    Add your chicken stock and cannellini beans.

    When the beans and stock are nicely simmering, mash the beans into the consistency of good mashed potatoes.   You may optionally wish to add butter and/or cream at this step to increase the flavor -and calories.

    Serve and enjoy.

    OPTIONS:  You may enjoy adding butter and cream to your mashed beans the way you would when making homemade mashed potatoes.  I've also made this dish with more cooked garlic to make a type of faux garlic mashed potatoes.  The recipe lends itself to other potato dishes such as adding rosemary to the beans or melting cheese into the mashed beans.

    DIETS:
    Diabetic:  yes
    Gluten Free:  yes
    Nightshade Family Free:  yes
    Paleo:  no (has beans)
    SugarBusters:  yes
    Sugar Free:  yes
    Vegan:  yes* (must use vegetable stock instead of chicken stock)
    Vegetarian:  yes* (must use vegetable stock instead of chicken stock)
    Wheat Free:  yes
    200 Calories or Under:  yes* (if you only 1/2 cup)

    Notice:  Be sure to check with your doctor and nutritionist about the safety of any eating plan for you.  Also, check ingredients as different brands and products may have different ingredients or have changed them since this post.  Some calories are estimates based on packaging.  

    Thursday, November 21, 2013

    Roasted Pears

    Until about a year ago, I really did not know what the slang phrase nom, nom, nom meant.  I kept thinking it was a short form of some food-related word starting with nom.  My friends will readily tell you that knowledge of and insights into popular culture elude me!  But let me tell you this, these roasted pears are nom, nom, nom! (For those other clueless people like myself until a year ago, nom, nom, nom is a phrase you use to imitate eating something you find delicious.)

    If you are like me, I associate pears with the bland, mushy, canned version.  Yuck!  Even fresh pears are often -well- bland and mushy.  Roasting turns these drab wallflowers of the fruit world into Cinderellas at the ball.  The roasting brings out sweetness and flavor.  You'll be amazing.

    Nom. Nom.  Nom.


    • Several fresh pears (most all varieties do well but I prefer Anjou pears best)
    • Enough fresh or dried cranberries to sprinkle on top of each half of your sliced pears
    • Oil
    • Allspice (if you don't have allspice, you can also use cinnamon and/or cloves)
    • Maple syrup
    Pre-heat your oven to 350 F.

    Peal each pear and remove the ends.  You can bake these with the skins on the pears but pealing makes them much easier to eat.  The skins are also not as succulent and tasty as the roasted flesh of the pears.

    Using a teaspoon or melon baller, scoop out the seeds and a small cavity in the middle of each pear.  If the pears will not lie steady with the cavity side facing up, slice a bit off the rounded side to make that side flat.

    Pour some oil in a casserole dish.  Lightly roll and coat each pear in the oil.  

    Drizzle maple syrup over the pear halves.  

    Put several dried cranberries in the cavities of each pear half.  

    Sprinkle with lightly with allspice.  BE CAREFUL:  too much allspice and especially too much cloves if you use cloves as a substitute can be overpowering.  

    Bake for 30 minutes.  Remove and serve.


    OPTIONS:  Experiment with different types of pears and different spices.  Some people enjoy fresh nutmeg.  Ina Garten, the Barefoot Contessa, makes a wonderful version of this recipe made with walnuts, bleu cheese, and dried cranberries.  

    If you do not have maple syrup, you can also use brown sugar and butter placed in the cavity of each pear.  The maple syrup packs a lot of flavor with fewer calories though.  Fresh cranberries are also the way to go if you are a diabetic.  Dried cranberries generally have a lot of sugar in them.

    DIETS:
    Diabetic:  maybe (the fruit has sugar and this dish has maple syrup)
    Gluten Free:  yes
    Nightshade Family Free:  yes
    Paleo:  yes* (if you allow yourself to have maple syrup)
    SugarBusters:  no
    Sugar Free:  no
    Vegan:  yes
    Vegetarian:  yes
    Wheat Free:  yes
    200 Calories or Under:  yes* (if you use the oil and maple syrup very sparingly)

    Notice:  Be sure to check with your doctor and nutritionist about the safety of any eating plan for you.  Also, check ingredients as different brands and products may have different ingredients or have changed them since this post.  Some calories are estimates based on packaging.  

    Wednesday, November 20, 2013

    Choux de Bruxelles aux Lardons et Radis

    Ahhhh...Choux de Bruxelles aux Lardons et Radis...truly a taste of paradise!  So maligned are poor Brussel sprouts that I thought using the French name for this dish might entice the wary into trying it.  Choux de Bruxelles aux Lardons et Radis translates as Brussel Sprouts with Bacon and Radishes.  It is a surprisingly wonderful and colorful dish that packs great flavor for any Thanksgiving meal.

    There are many versions of this dish.  Some cooks use pancetta instead of bacon.  Others throw in some garlic or slice the sprouts into thin wafers before cooking.  I've also read of people roasting rather than sauteing this dish.  I'm sure they all turn out yummy.


    • Bag of fresh (preferably but frozen and thawed will work but not be as colorful) Brussels sprouts
    • 4-5 slices of cooked bacon (uncooked is an option too...see below under OPTIONS)
    • Some diced fresh radishes
    • Oil or bacon grease
    • Salt and pepper to taste
    Slice the Brussel sprouts and steam until a brilliant green but not until they are mushy.

    Put some oil or bacon grease in a non-stick skillet.  

    Saute the sprouts and diced radishes in the oil.  As they cook, crumble up the bacon and saute with the vegetables.  

    Salt and pepper to taste.

    I like to saute my sprouts until they are nicely browned on the flat, cut side.

    OPTIONS:  If you are eating a vegan or vegetarian diet, you'll of course want to forego the bacon and bacon grease.  The same goes if you are making this dish for a kosher Hanukkah.

    But if you are a lardon-hungry carnivore, you can also make this dish by frying up some uncooked bacon and then sauteing your sprouts and radishes in the hot, bacon grease.  

    DIETS:
    Diabetic:  yes
    Gluten Free:  yes
    Nightshade Family Free:  yes
    Paleo:  yes
    SugarBusters:  yes
    Sugar Free:  yes
    Vegan:  yes*  (if you leave out the bacon and bacon grease)
    Vegetarian:  yes*  (if you leave out the bacon and bacon grease)
    Wheat Free:  yes
    200 Calories or Under:  yes* (if you leave out the bacon and use oil sparingly)

    Notice:  Be sure to check with your doctor and nutritionist about the safety of any eating plan for you.  Also, check ingredients as different brands and products may have different ingredients or have changed them since this post.  Some calories are estimates based on packaging.  

    Sunday, November 17, 2013

    Gobble Tov!

     Photo Credit: oschene via Compfight cc
    This week I began a series of recipes that represent a rare joint overlap of Thanksgiving and Hanukkah!  Happy Gobble Tov indeed!  It is also my birthday this week, so I may have to find a suitable cake recipe to throw in.

    Enjoy.  Happy Thanksgiving.  Mazel Tov!


    Saturday, November 9, 2013

    Fiery Eggplant

    Picture courtesy of Restaurant Girl


    • 1 large eggplant, cut into wedges
    • 1 can diced tomatoes
    • 1 Tsp ginger paste or a 2 inch piece of fresh ginger, diced
    • 1 Tsp minced garlic or 10 cloves of fresh garlic
    • 2/3 c vegetable oil
    • 1 Tsp fennel seeds
    • 8-10 cayenne, Serrano, or green Thai chilis, stems removed, chopped
    • 2 Tsp ground coriander
    • 1 tsp turmeric powder
    • 2 tsp red chili powder
    • 1 Tsp salt


    Place the cut eggplant in a colander sitting on a plate.  Sprinkle with salt.  Let stand at least 30 minutes or more.  The eggplant will release a brown liquid.  This process will remove much of the eggplant’s bitterness.  

    Then wash off the salt and empty the eggplant onto a paper towel to dry somewhat.

    Add the diced tomatoes, ginger paste, and minced garlic to the crockpot. 

    Saute the fennel seeds in about 1 Tsp oil over medium-high heat.  Then scrap the seeds and oil into the crockpot.  The heating releases the fennel’s flavor.

    Add the vegetable oil, chilis, coriander, turmeric, and eggplant to the crockpot.  

    Cook on low for 3-4 hours.

    Add salt to taste when the eggplant is done.

    Adapted from Anupy Singla’s The Indian Slow Cooker:  50 Healthy, Easy, Authentic Recipes, 2010.

    DIETS:
    Diabetic:  yes
    Gluten Free:  yes
    Nightshade Family Free:  no
    Paleo:  yes
    SugarBusters:  yes
    Sugar Free:  yes
    Vegan:  yes
    Vegetarian:  yes
    Wheat Free:  yes
    200 Calories or Under:  no (this dish is too rich in oils)

    Notice:  Be sure to check with your doctor and nutritionist about the safety of any eating plan for you.  Also, check ingredients as different brands and products may have different ingredients or have changed them since this post.  Some calories are estimates based on packaging.  

    Friday, November 8, 2013

    Delicious Salad

    200 Calorie Meals:

    The key to enjoying a series of salads is to add different, delicious ingredients to the base of lettuce.

    Water:  0 calories
    Salad:  65 calories
    • Kroger artisan lettuce        14 calories, 3 ounces
    • Kroger grape tomatoes     17 calories, 2 ounces
    • Carrot chips                      18 calories, 1.5 ounces
    • Mushrooms, raw                 4 calories, 1/4 cup
    • Dressing of fresh lemon juice 12 calories, 1 whole lemon
    • Salt & Pepper

    TOTAL:  65 calories

    DIETS:
    Diabetic:  yes
    Gluten Free:  yes
    Nightshade Family Free:  yes* (if you leave out the grape tomatoes)
    Paleo:  yes
    SugarBusters:  yes
    Sugar Free:  yes* (natural fruit sugars only)
    Vegan:  yes
    Vegetarian:  yes
    Wheat Free:  yes
    200 Calories or Under:  yes

    Notice:  Be sure to check with your doctor and nutritionist about the safety of any eating plan for you.  Also, check ingredients as different brands and products may have different ingredients or have changed them since this post.  Some calories are estimates based on packaging.  

    Wednesday, November 6, 2013

    Ropa Vieja

    Yum!:


    I do not know the calories in a serving of this delicious slow cooker recipe, but it is compliant with those eating a gluten free, SugarBusters, diabetic, or Paleo eating plan.

    Ropa Vieja -old clothes in Spanish- makes for a delicious dinner.  This traditional Cuban dish gets its name from the resemblance of the strips of succulent pork and peppers to strips of old clothes cut into rags.


    1. Combine in a slow cooker set to 4 hours (high)...or slower, longer if you wish:
      • a pork roast
      • 1 Tablespoon dried oregano
      • 1 Tablespoon cumin powder
      • 5-7 bay leaves
      • 8-10 green olives with pimientos
      • 2 large onions, cut into slices or diced
      • 4 green/red/yellow peppers, cored, sliced and cleaned of seeds
      • 1 can diced tomatoes or fresh tomatoes diced
      • 2 stalks of celery cut into 1 inch lengths
      • 3 carrots peeled and cut into 1 inch lengths
      • 1/4 teaspoon salt (you can salt to taste more when serving)
      • 1/4 teaspoon pepper
      • a dozen grapes (optional, adds a yummy hint of sweetness)
    2. Enjoy by itself or serve over diced, roasted cauliflower as a rice substitution.  The traditional dish is served over rice, but the cauliflower is an improvement in my book for flavor.
    This dish improves its flavor after resting awhile in the refrigerator.  Thus, it makes for great leftovers and savory lunches warmed up in the office microwave.

    DIETS:
    Diabetic:  yes
    Gluten Free:  yes
    Nightshade Family Free:  no
    Paleo:  yes
    SugarBusters:  yes
    Sugar Free:  yes
    Vegan:  no
    Vegetarian:  no
    Wheat Free:  yes
    200 Calories or Under:  yes (especially if you do not eat the olives)

    Notice:  Be sure to check with your doctor and nutritionist about the safety of any eating plan for you.  Also, check ingredients as different brands and products may have different ingredients or have changed them since this post.  Some calories are estimates based on packaging.  

    Friday, October 11, 2013

    Fruit Smoothies

    200 Calorie Meals:

    My friend Sue introduced me to these delicious smoothies.  I use a variety of fresh and frozen fruits.  So far, my favorite is a smoothie made with fresh cherries.  In a pinch, I use Kroger's Private Selection Triple Berry Medley of frozen berries.  Mix the yogurt and berries together in a blender and enjoy about a cup of the creamy deliciousness. 


    Black Coffee:   5 calories, 1 cup
    Dannon Light & Fit Non-Fat Vanilla Yogurt:  60 calories, 3 ounces 
    Kroger Private Selection Triple Berry Medley:  40 calories, 1/2 cup     

    TOTAL:  100 calories

    DIETS:
    Diabetic:  yes
    Gluten Free:  yes
    Nightshade Family Free:  yes
    Paleo:  no (has dairy)
    SugarBusters:  yes
    Sugar Free:  yes
    Vegan:  no
    Vegetarian:  yes
    Wheat Free:  yes
    200 Calories or Under:  yes

    Notice:  Be sure to check with your doctor and nutritionist about the safety of any eating plan for you.  Also, check ingredients as different brands and products may have different ingredients or have changed them since this post.  Some calories are estimates based on packaging.  

    Thursday, September 26, 2013

    Welcome

    Welcome

    Welcome to Tastes for All Waists, my blog about my experiences with healthier eating.  I begin this blog after finding few resources for information on the Web.  Rather than being hellish and completely limiting, I find that my periods of low calorie  and/or healthy eating opened a door for exciting challenges in cooking!

    Some Background on Me:  I have experimented with various diets -SugarBusters, vegetarian, Newcastle, etc.  I have come to focus on a 90/10 rule:  90% of my eating must be focused on vegetables, meats, and fruits.  I limit processed foods, grains, and sugar in my diet.  Experience with my own blood sugar spikes and research readings led me to absolutely ban corn syrup from my diet if at all possible.  This is more difficult to do than you may think because that stuff is in seemingly any processed food or condiment in the US.

    I became interested in low calorie eating undertaken for short periods of time after reading about the Newcastle Diet and other food-based approaches to diabetes control.  Having been a diabetic since 2006, I have found increasingly that what I put into my mouth often dictates my health and my mood.  I love to cook -and eat too (wink)- and thus shedding pounds has not always been easy for me.  So in 2013 my partner and I began an 11 day eating plan where we ate around 600 calories a day.  This blog offers recipes and tips.  As my partner says:   

    When I look online for recipes for 200 calorie meals, all I find are pages about eating 3 crackers and a wedge of cheese.  We will starve!

    Well, we didn't.  In fact, we ate healthier and better than we often ate before this experience.  My blood sugars improved dramatically to the point I had to greatly reduce my insulin after several low blood sugar moments; the first such experiences for me.  After 11 days, however, we returned to eating regular meals and quickly regained the weight loss from water loss and waste cleansing.  We now try to eat under 2000 calories a day and walk 2 miles a day.  The Newcastle restricted calorie experience, however, taught me some great lessons on how to maximize food bulk with the fewest calories.  This experience informs my recipes and cooking today.

    So welcome to you.  I hope that you find my recipes helpful and are inspired to create new and healthier versions of your own favorite dishes.